Before and After: Dream Kitchen Transformation for My Sister-in-Law
My sister-in-law and her partner began renovating their small kitchen last year. They removed the wall dividing the open concept living area and the kitchen, and took out the tiny island. Although these were major improvements, the kitchen still felt compact and didn’t meet their family's functional needs. So, when she asked me to help redesign and update her kitchen, of course I said yes. It was going to be another challenge with them living two hours away, but I knew it would be worth it for the perfect kitchen makeover.
Part One: The Moodboard
Like all my home decor projects, it all started with a mood board. The plan was to redesign the kitchen cabinet layout, but since we were working with a budget, we had to keep the existing appliances and corner sink placement. Moving plumbing or even the gas line would add to the total cost. I love a good challenge! Our goal was to maximize storage and add a larger kitchen island for meal prep, all while making the space look beautiful, modern, and clutter-free.
Designing a kitchen in an open-concept home was a first for me, so I was definitely nervous, I wanted this kitchen to fell warm and inviting. This is also only the second kitchen I've ever designed, but I learned so much from when we renovated our own kitchen. I'm thrilled with how it turned out!
The kitchen moodboard.
Part Two: New Cabinets, Island and Vent Hood
Cabinets: The Splurge
The demolition started, and there was no turning back. The first step was to create a new layout for the new cabinets and kitchen island. We were deciding between Ikea cabinets or custom cabinets for this kitchen renovation. While the cost of going with Ikea cabinets would be less, Ultimately, my sister-in-law chose custom cabinets and I think these are so worth the investment. Having an Ikea kitchen -with custom doors- myself, I can say, these feel and look like they would last so much longer.
Opting for a classic and simple style with shaker overlay doors. This choice was more affordable and aligned with our tight budget.
Kitchen Island
Now that the kitchen island was installed, it was time to customize it even more. The cabinet makers installed two three-drawer base cabinets side by side, making the island a total of 6 feet long. Now, it was our turn to create an overhang for the stools.
One of the small inconveniences of doing this project ourselves became apparent at this step of the process—we couldn’t fit a large sheet of plywood in our car, lol. But it was nothing we couldn’t solve. We transported it cut in half! We used four wood legs and attached the plywood to them to create the side panels for each side of the island, extending it a bit more. Then, we added tongue and groove boards all around to cover it and achieve a seamless look. We were happy with how it looked, so it was time to move on to the next step: building the vent hood.
The kitchen island front with the three-drawer base cabinets.
Vent Hood
The previous vent hood in my sister-in-law’s kitchen was a microwave combo built into the cabinet. The plan for the new design was to raise the vent hood up to the ceiling to fully appreciate the height of the space. For this, we took inspiration from the vent hood we built in our kitchen. The only thing we changed was that instead of plaster, we used the same boards we installed on the island.
To finish the vent hood, we added trim using an 8-inch board, crown molding at the top, and a small trim at the bottom. It was hard work and took longer than we expected, but it turned out great and made a huge difference in the kitchen.
Part Three: Countertops and Backsplash
Countertops
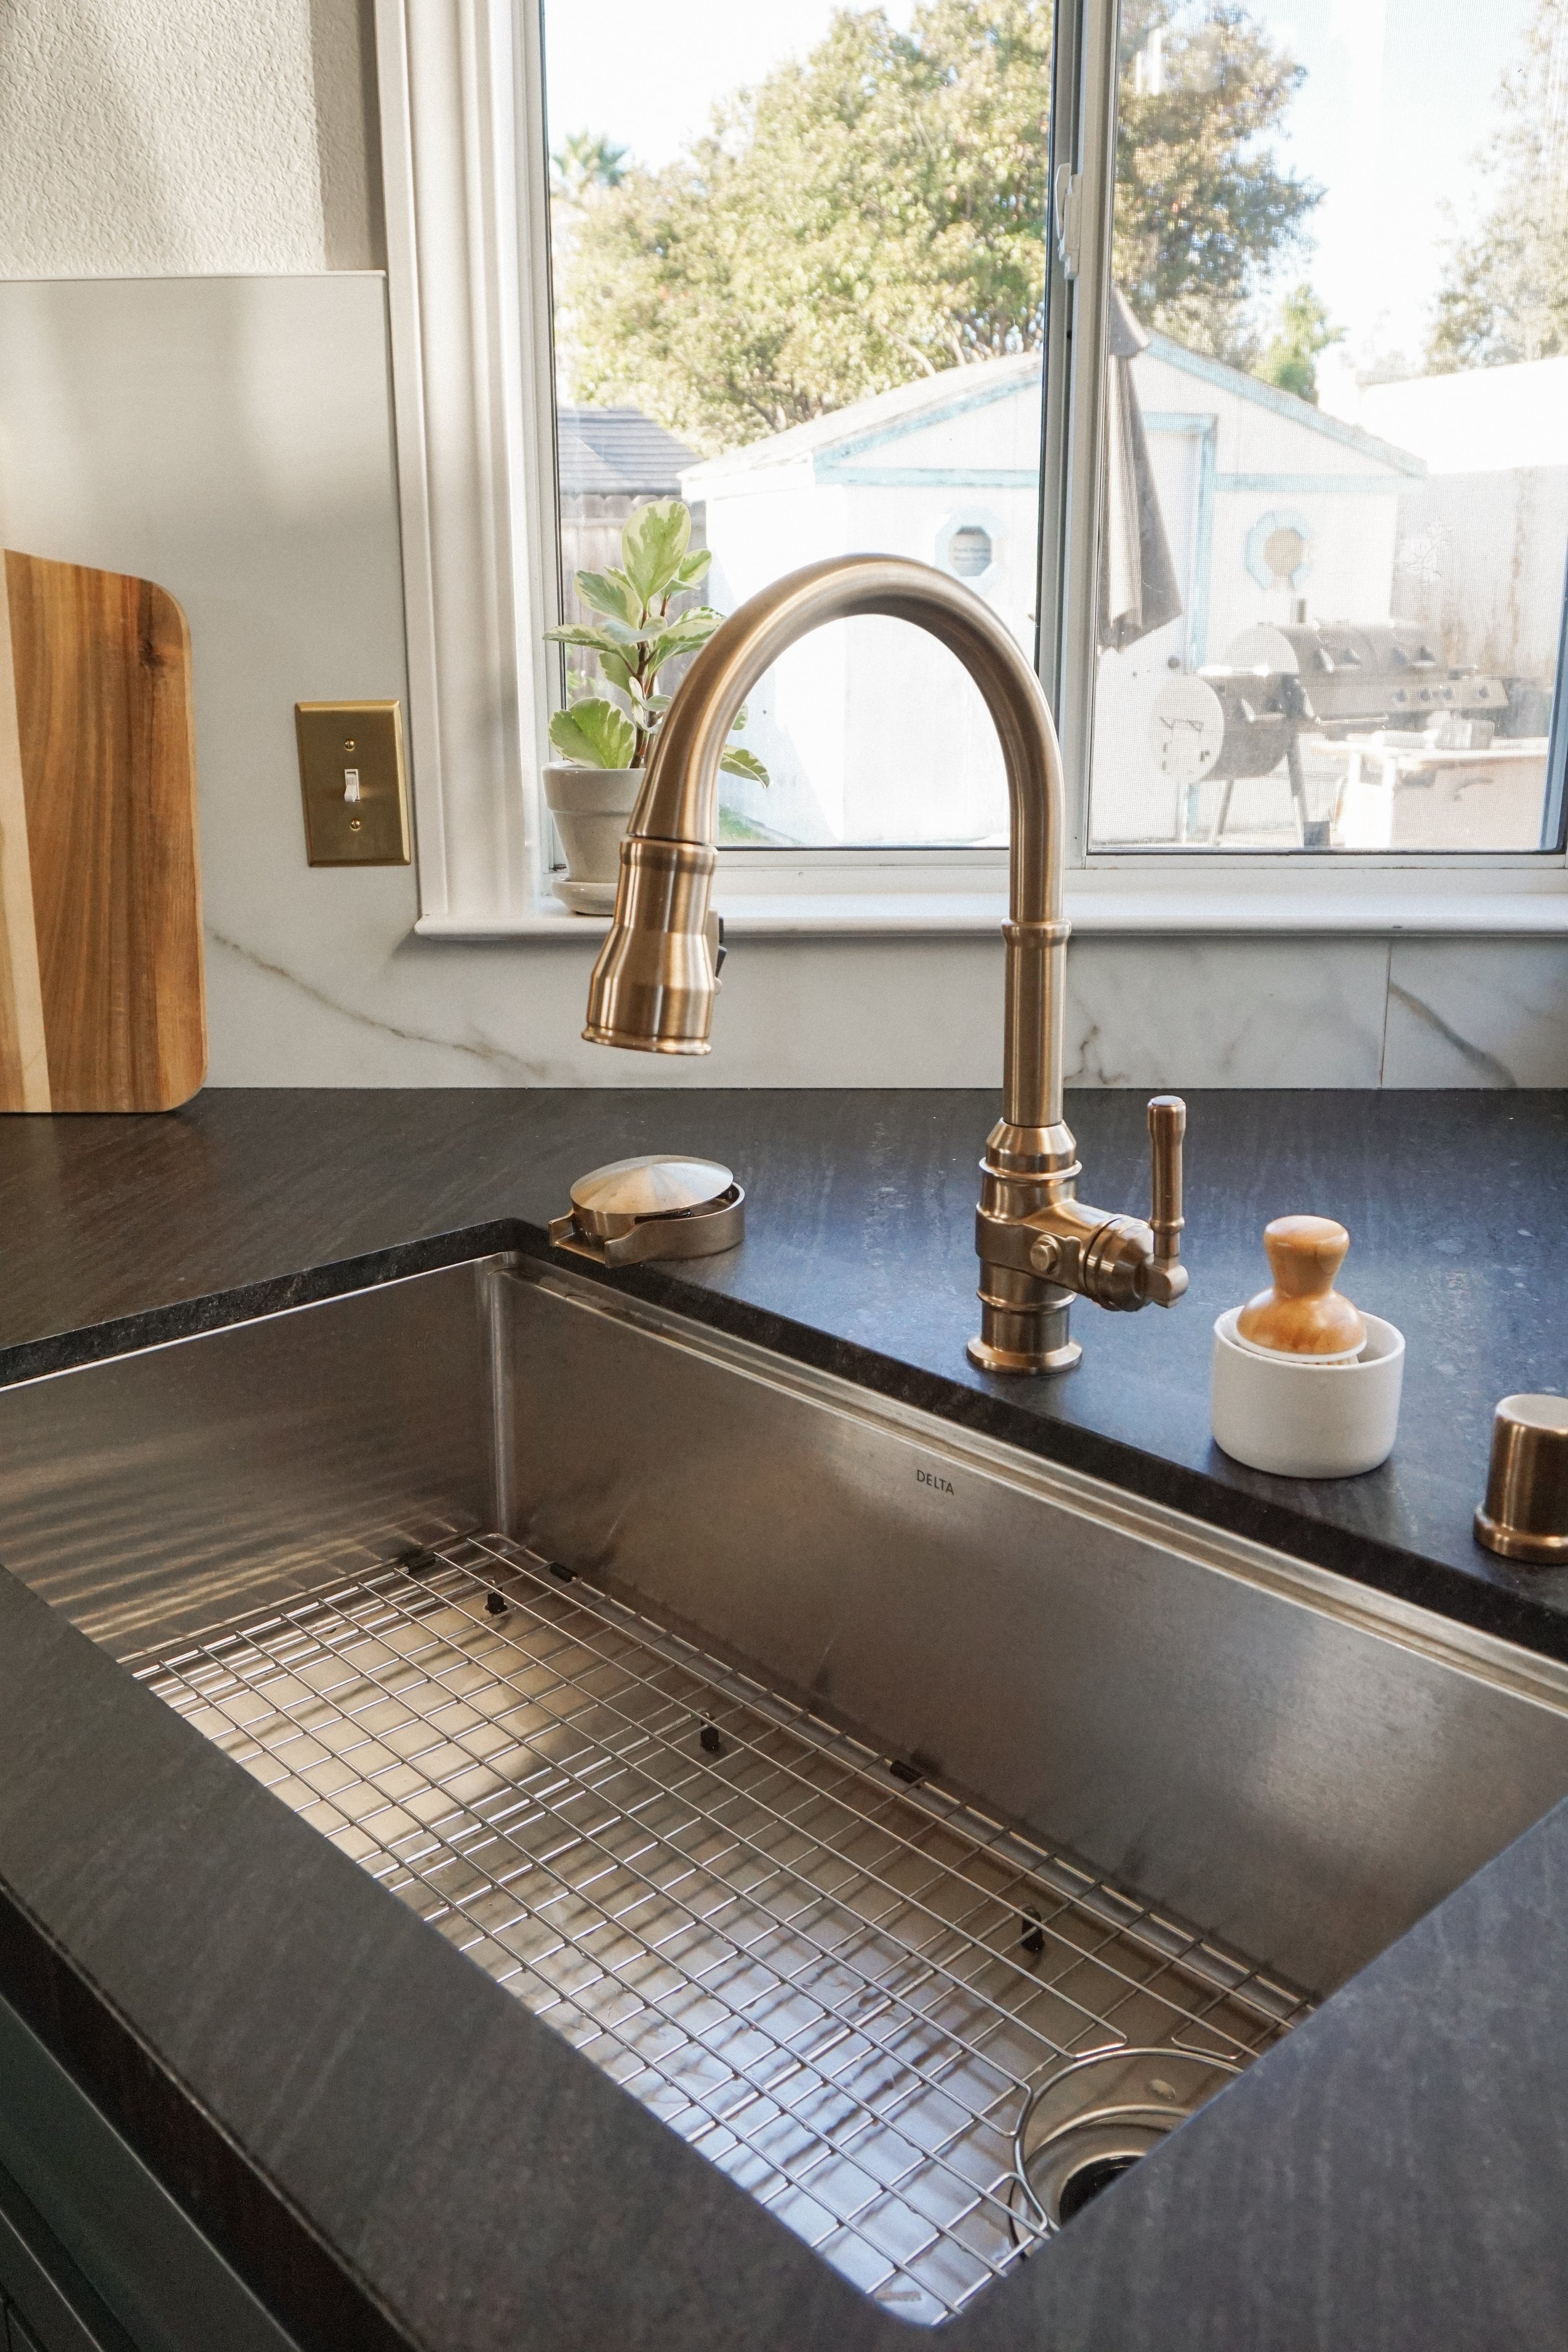
This might be a bit of a surprise, but we opted for dark granite countertops instead of the classic marble or Quartz. Why? Because it gives us the look of soapstone without the price tag! Plus, granite is a stronger material, making it perfect for kitchens that see a lot of daily use. We chose a honed finish for a more organic feel, which I think highlights all the best features of the slab. I think Granite is so underrated. Names to ask for when looking for similar granite slabs are Virginia Mist, Black mist, Negresco.
Since we went with an overlay cabinet style, we opted for a thicker 2 cm beveled edge on the countertop to balance nicely with the cabinet fronts.
The granite countertop looks perfect with the color we chose of the cabinets.
Backsplash
I’m a huge fan of marble backsplashes and marble countertops (I have marble countertops in my own kitchen), but as I mentioned earlier, marble can be very expensive and high-maintenance. So when I found this beautiful oversized tile under $600, I knew it would be perfect for achieving that luxurious look my sister-in-law wanted, while staying within our budget-friendly limits.
We laid out all the tiles on the floor, almost like a big puzzle, carefully matching the seams as closely as possible for a more realistic marble effect. Although we initially considered DIY tile installation, with our little ones at home (my three kids and dog, and my sister-in-law’s toddler and cats), we decided it would be quicker to hire professional tile installers—and that’s exactly what we did. We opted for a 1/16" spacing between tiles for a thin grout line and used a light gray grout to blend with the tile color. It turned out even better than we imagined.
If there’s one thing I want to emphasize at this point in the process (if is not already clear), it’s that you don’t have to sacrifice style for price!
We laid out all the tiles on the floor carefully matching the seams, just like puzzle pieces.
Part 4: It’s Time for Color!
The original plan was to go with a light blue/green color for the kitchen cabinets, but my sister-in-law and her partner suggested a shade of teal. After the countertops were installed, I realized that a darker color was exactly what the kitchen needed. My goal became finding a color that felt timeless and wasn’t too bold. After some research, lots of color samples, and an Instagram poll, I ended up choosing Inchyra Blue by Farrow & Ball—a gorgeous jewel-tone blue/green that pairs beautifully with the countertops and flooring.
As for the vent hood, the original idea was to paint the wood planks the same color as the walls, but they looked so warm and natural that we ultimately decided to leave them as is for now and just paint the trim the same color as the cabinets. While I do have to say, eventually these boards might be painted white, time will tell.
Sources from this Kitchen view.
Part 5: The Final Details
Sometimes the small details make the biggest impact, and although the kitchen had already undergone a significant transformation, there were a few more things to add to make it perfect.
One of those details was the hardware. We needed to replace the white outlet covers! We chose a golden/antique brass color for all the small details, like the outlet covers, cabinet pulls, and knobs. The contrast with the blue/green tone of the cabinets was perfect and I was thrilled to find affordable options on Amazon.
Another detail was the sink in the corner. As I mentioned before, we couldn’t move the sink location, but we still wanted to update it. We chose a workstation sink, a glass rinser and, to maintain the same color palette, we went with a champagne bronze faucet from Delta.
A closer view of the Delta workstation sink.
Finally, we added floating shelves. These not only provide extra storage but also turn the bare wall into a striking accent wall. For the shelves, we chose an affordable option I found on Etsy. It was the best price I found for custom shelves. I ordered them unfinished because I wanted a specific color, but you can also order them stained.
To achieve the beautiful wood color, I applied one coat of Early American stain and one coat of Weathered Oak stain to tone down the yellow. Of course, don’t forget to use a wood conditioner before staining and finish with a satin topcoat.
Then came my favorite part: styling! (I shared a reel on my Instagram if you want to see it.) I love how the open shelves turned out. I think they provide the final finishing touch to this kitchen renovation project.
Kitchen shelves.
These stools are kid friendly and very sturdy.
Kitchen Renovation Expenses
Now, the part that everyone wants to see. The budget breakdown! I hope this is helpful and gives you a rough idea of what a kitchen renovation like this costs.
There are expenses that can be avoided, like the cost of painting cabinets - $2500- or tile installation -$1650- if you feel comfortable doing those, you can DIY them. The price for custom cabinets also vary a lot, there are lots of options out there for cabinets that look custom, it is always worth looking into multiple options so you can make a very inform decision and ultimately go with the option that fits your budget and the long term goals for your home.
I also wanted to be completely transparent with you and mention which things were kindly gifted by brand partners for this project, but, I still included the cost for reference.
Kitchen remodels might seem fun on social media, but they involve a lot of work. There’s extensive planning required, and knowing your kitchen renovation budget is a must. It also takes a lot of emotional investment—it’s stressful and far from glamorous, but completely worth it in the end. I put a lot of time into making thoughtful decisions about every inch of this kitchen renovation, and I hope the results reflect that. I’m proud of all the hard work we put in, and so grateful for the people who helped bring this vision to life. It was truly a team effort, and we couldn’t have done it alone.
Shop this post:


