
How to Improve The Look of Hollow Core Doors
This project was one of the simplest yet most impactful updates to our upstairs hallway. We transformed inexpensive, builder-grade hollow core doors into stunning, custom doors that give off a high-end, luxurious look. With just some PVC molding and sleek black paint, we achieved a dramatic home makeover on a budget. This is a project that can be done by one person, but if you can have an extra set of hands to help even better!
Let’s begin with the MLS picture of our upstairs hallway as the 'before' shot.
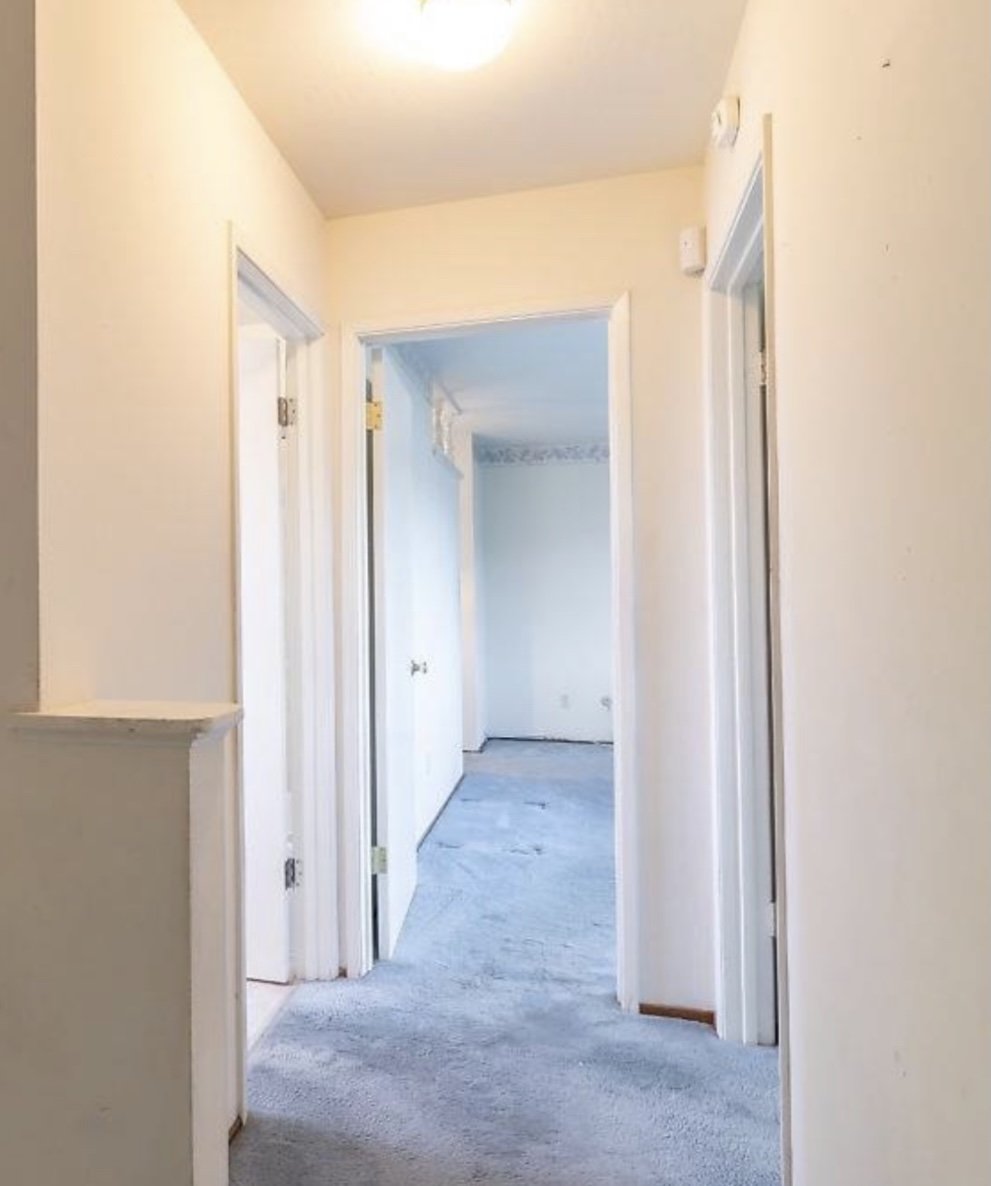
Upstairs hallway view to our primary bedroom.
The first step was deciding whether to go with one or two panels on the doors. We chose two panels because it would not only make the doors appear taller, but also create the illusion of a larger, more spacious hallway. I used blue tape to map out the door panel design, helping visualize the spacing and proportions. The key for me was getting the spacing between each panel and the distance from the panel to the door edge just right. I wanted these doors to look custom-made, not like a DIY project.
Once the design was finalized, we began cutting the PVC molding for each door. You can watch this home makeover project from start to finish here.
For this project, we chose PVC molding because it was a cost-effective alternative to wood, and its smooth surface provided a better paint finish. After painting, it’s impossible to tell the difference between PVC and wood. For this particular update, it didn’t make sense to invest more in wood.
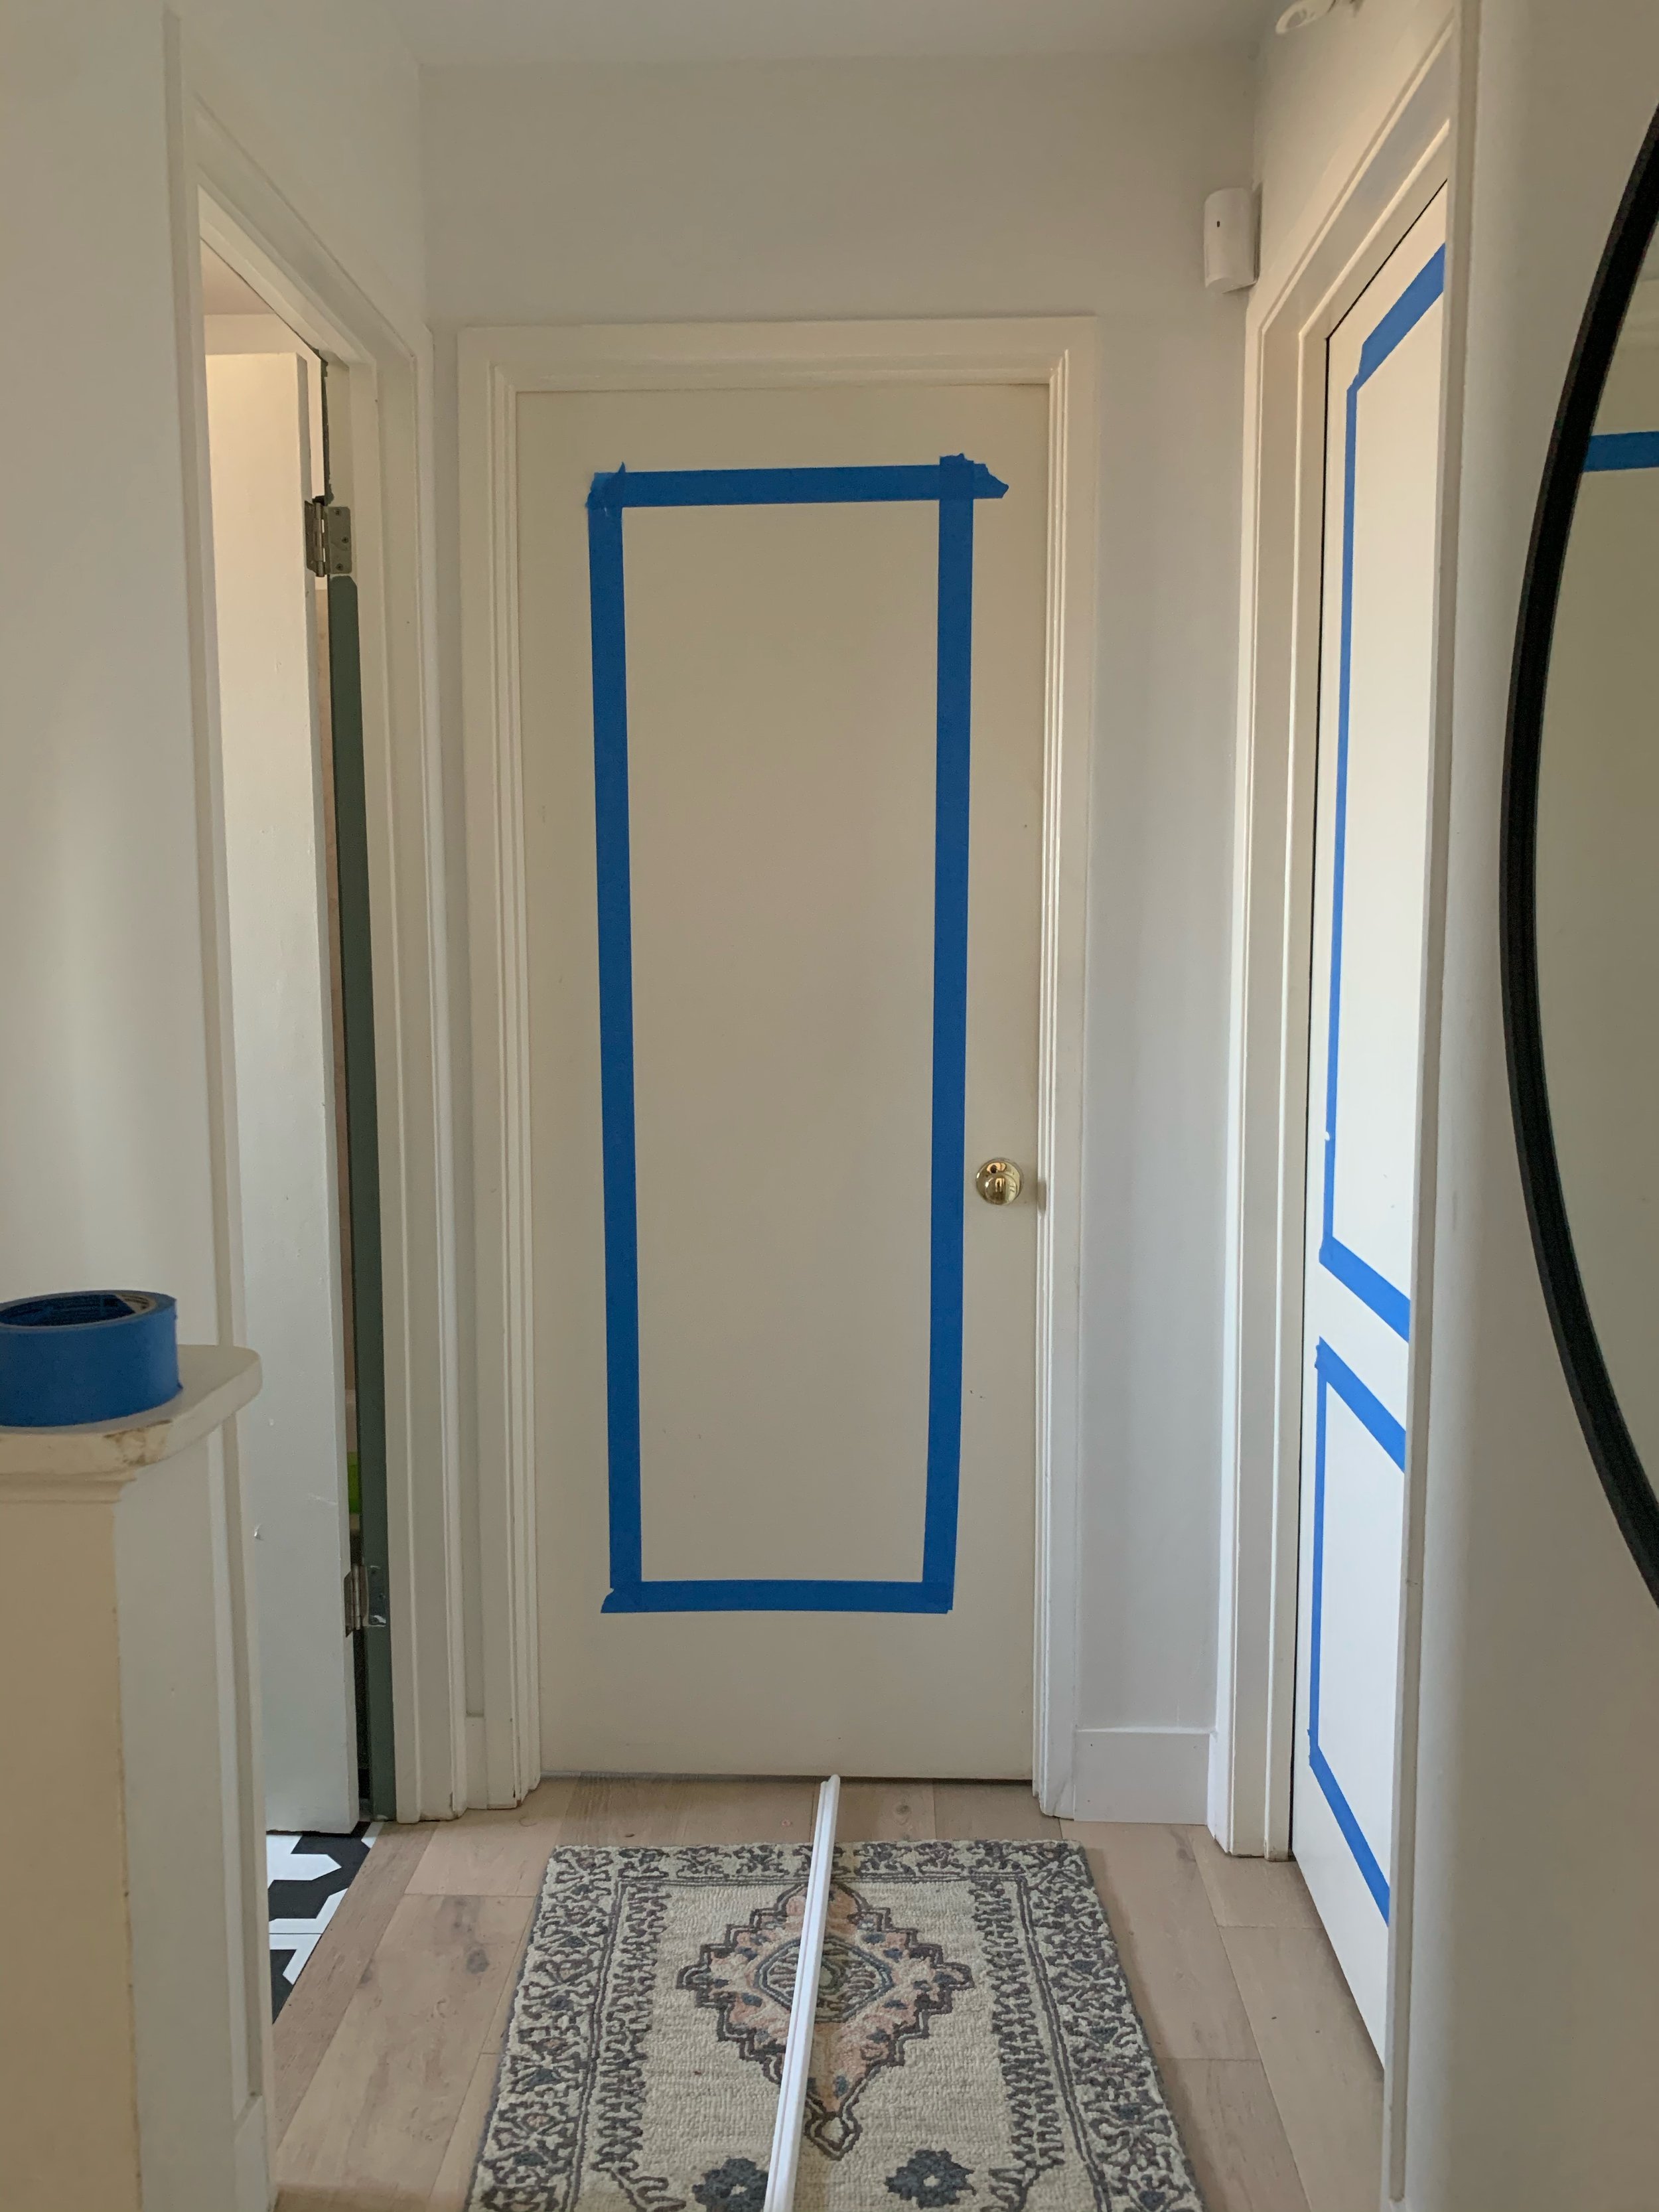
I used blue tape to map out the door panel design.

Pvc molding cut in 45 angle.


Our builder grade plain doors, already looking so much better.
For the spacing, we went with 5” on the top and sides, 4” between each panel, and 6 ¾” at the bottom. For reference, our doors are non-standard size, and we have 8-foot ceilings. For example, our bathroom door is narrower, so we had to account for that when cutting the molding pieces. However, we used the same spacing on all the doors for consistency.

Molding spacing measurements.
Once all the molding was securely glued to the door with liquid nails and nailed in place with brad nails, I began caulking all the seams for a seamless, professional finish. After the caulk dried, I used a de-glosser (also known as liquid sandpaper) to remove the shine and prep the doors for painting. This step eliminates the need for traditional sanding and helps the paint adhere better. Next, it was time for primer followed by paint.
To be honest, I skipped the primer during my first round of painting, and the paint started chipping off within a few months. When we hired a painter to handle our downstairs trim, we had him properly repaint the doors using the correct method—sanding, priming, and then spraying on the black paint. Lesson learned: never skip the primer!
The color we chose is Tricorn Black by Sherwin Williams, which I consider the perfect, true black for a sleek and modern finish.

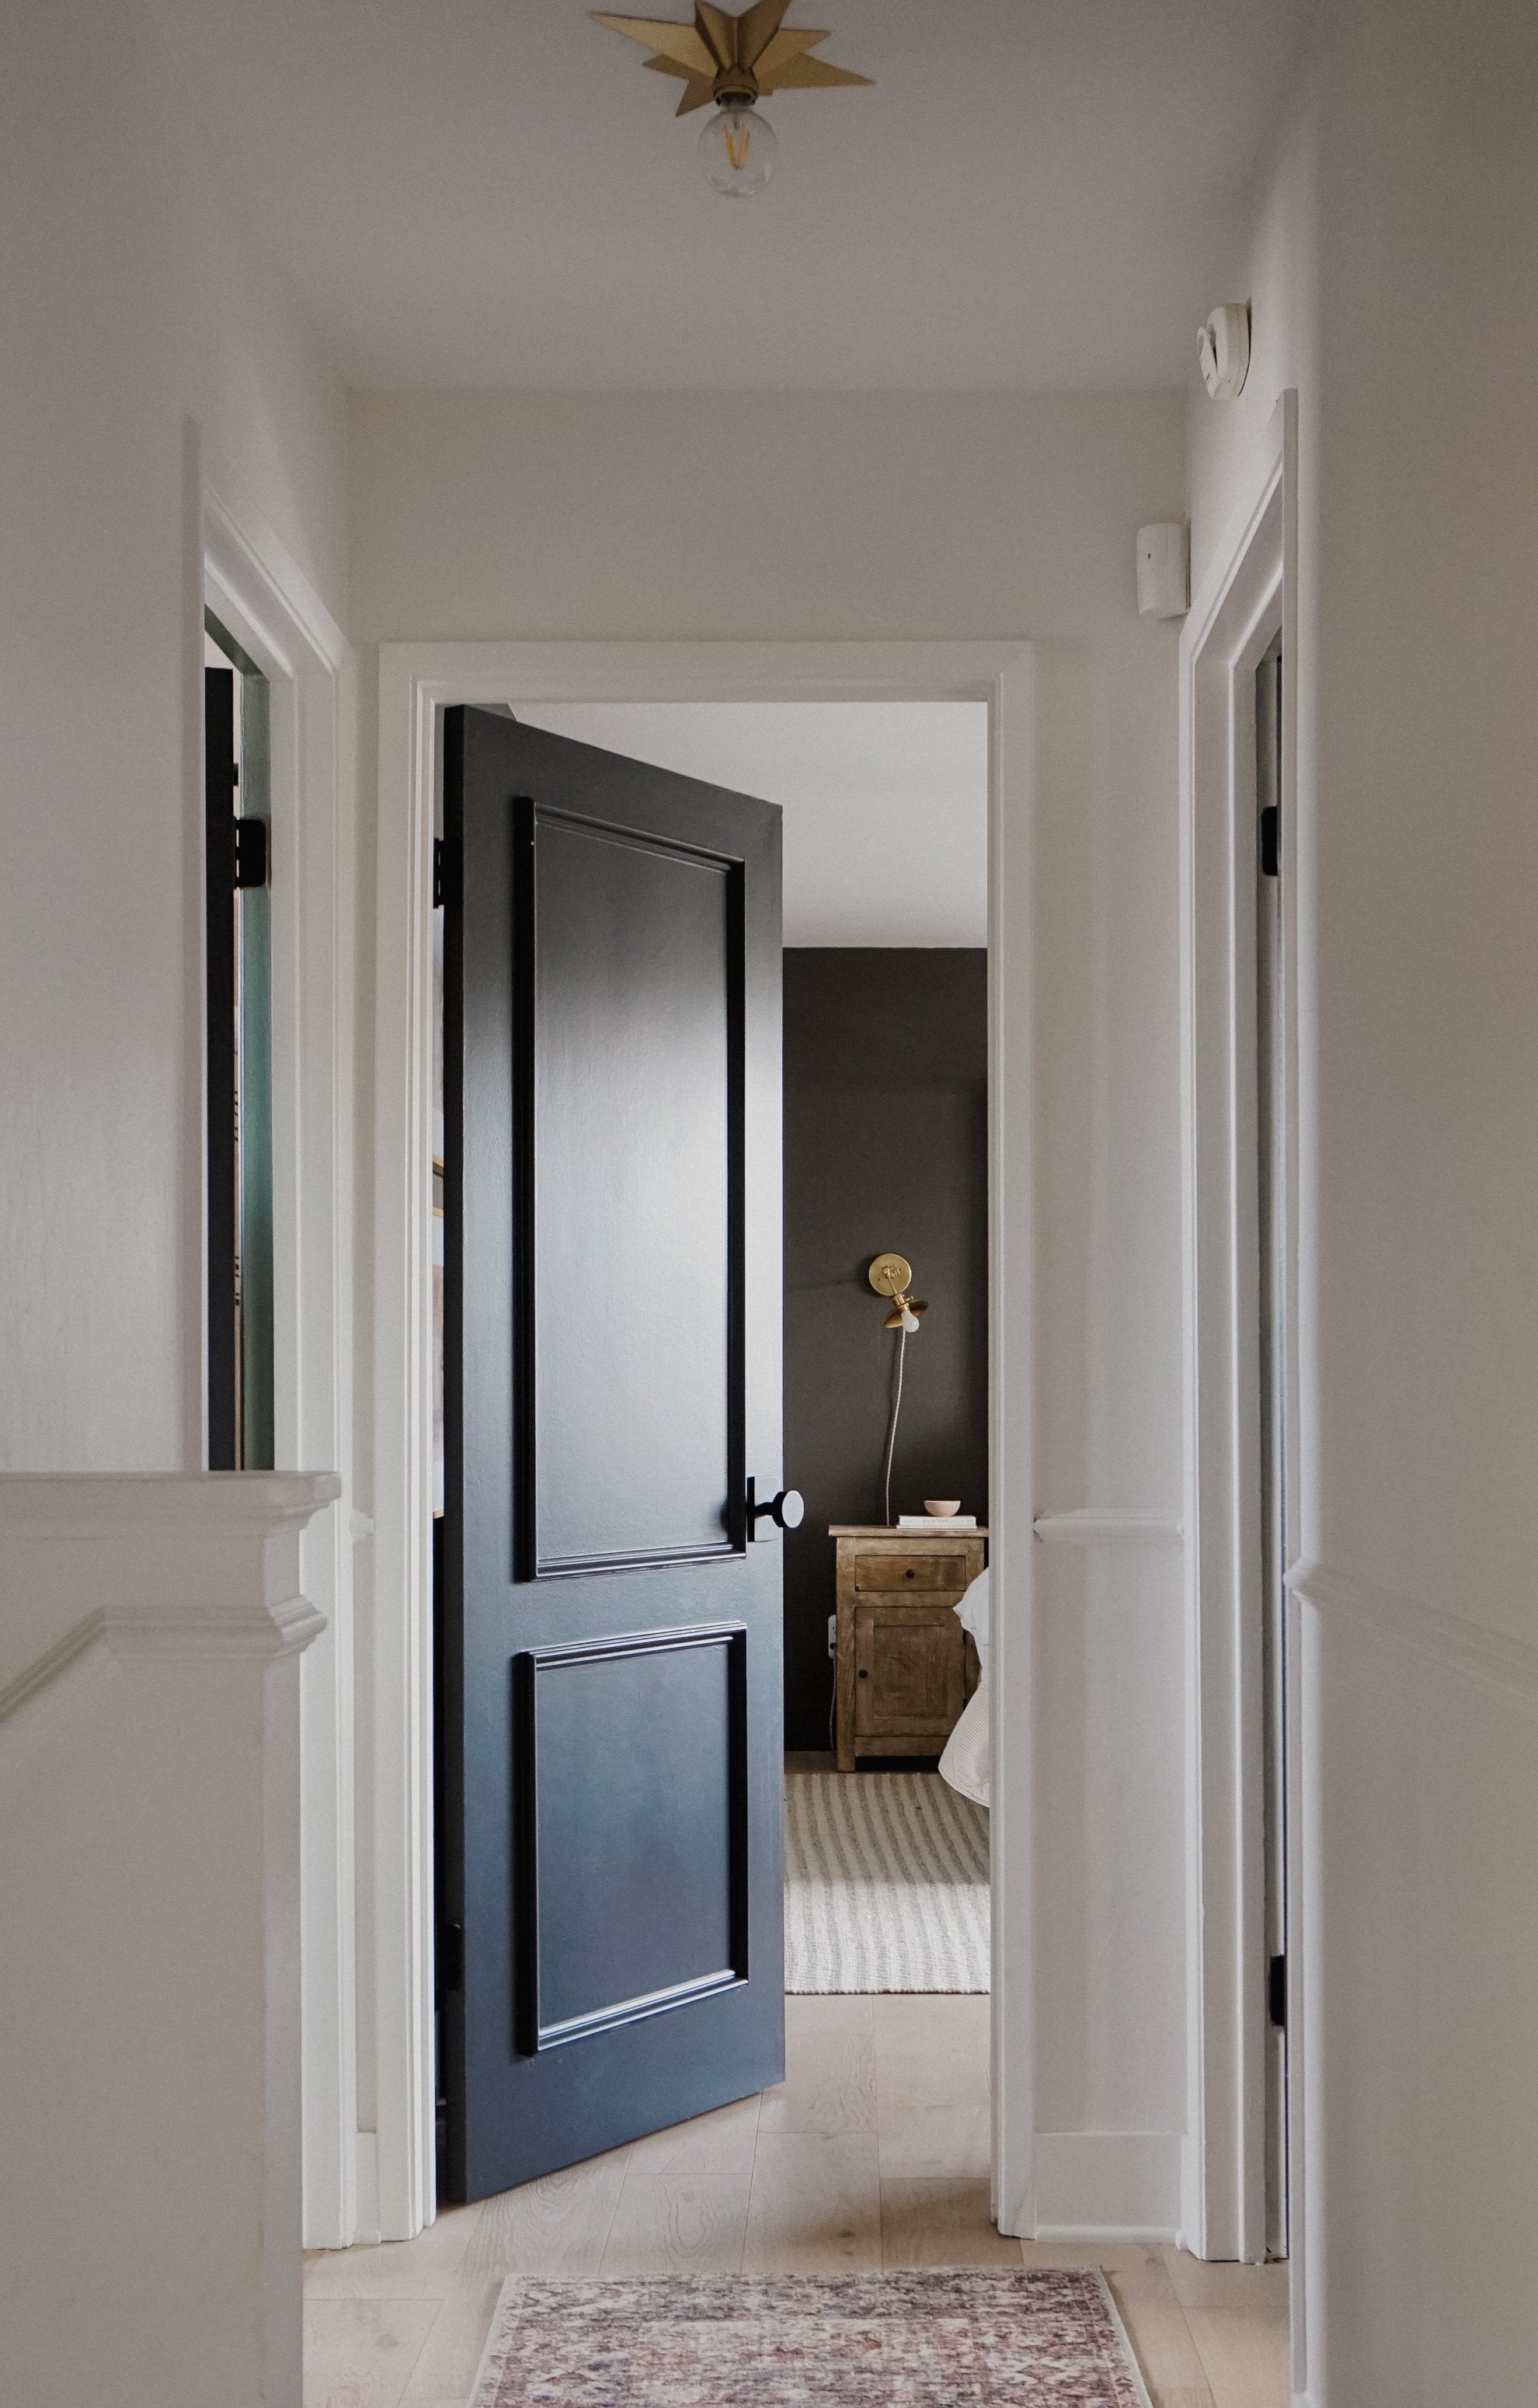
Hallway view into the boys bedroom.

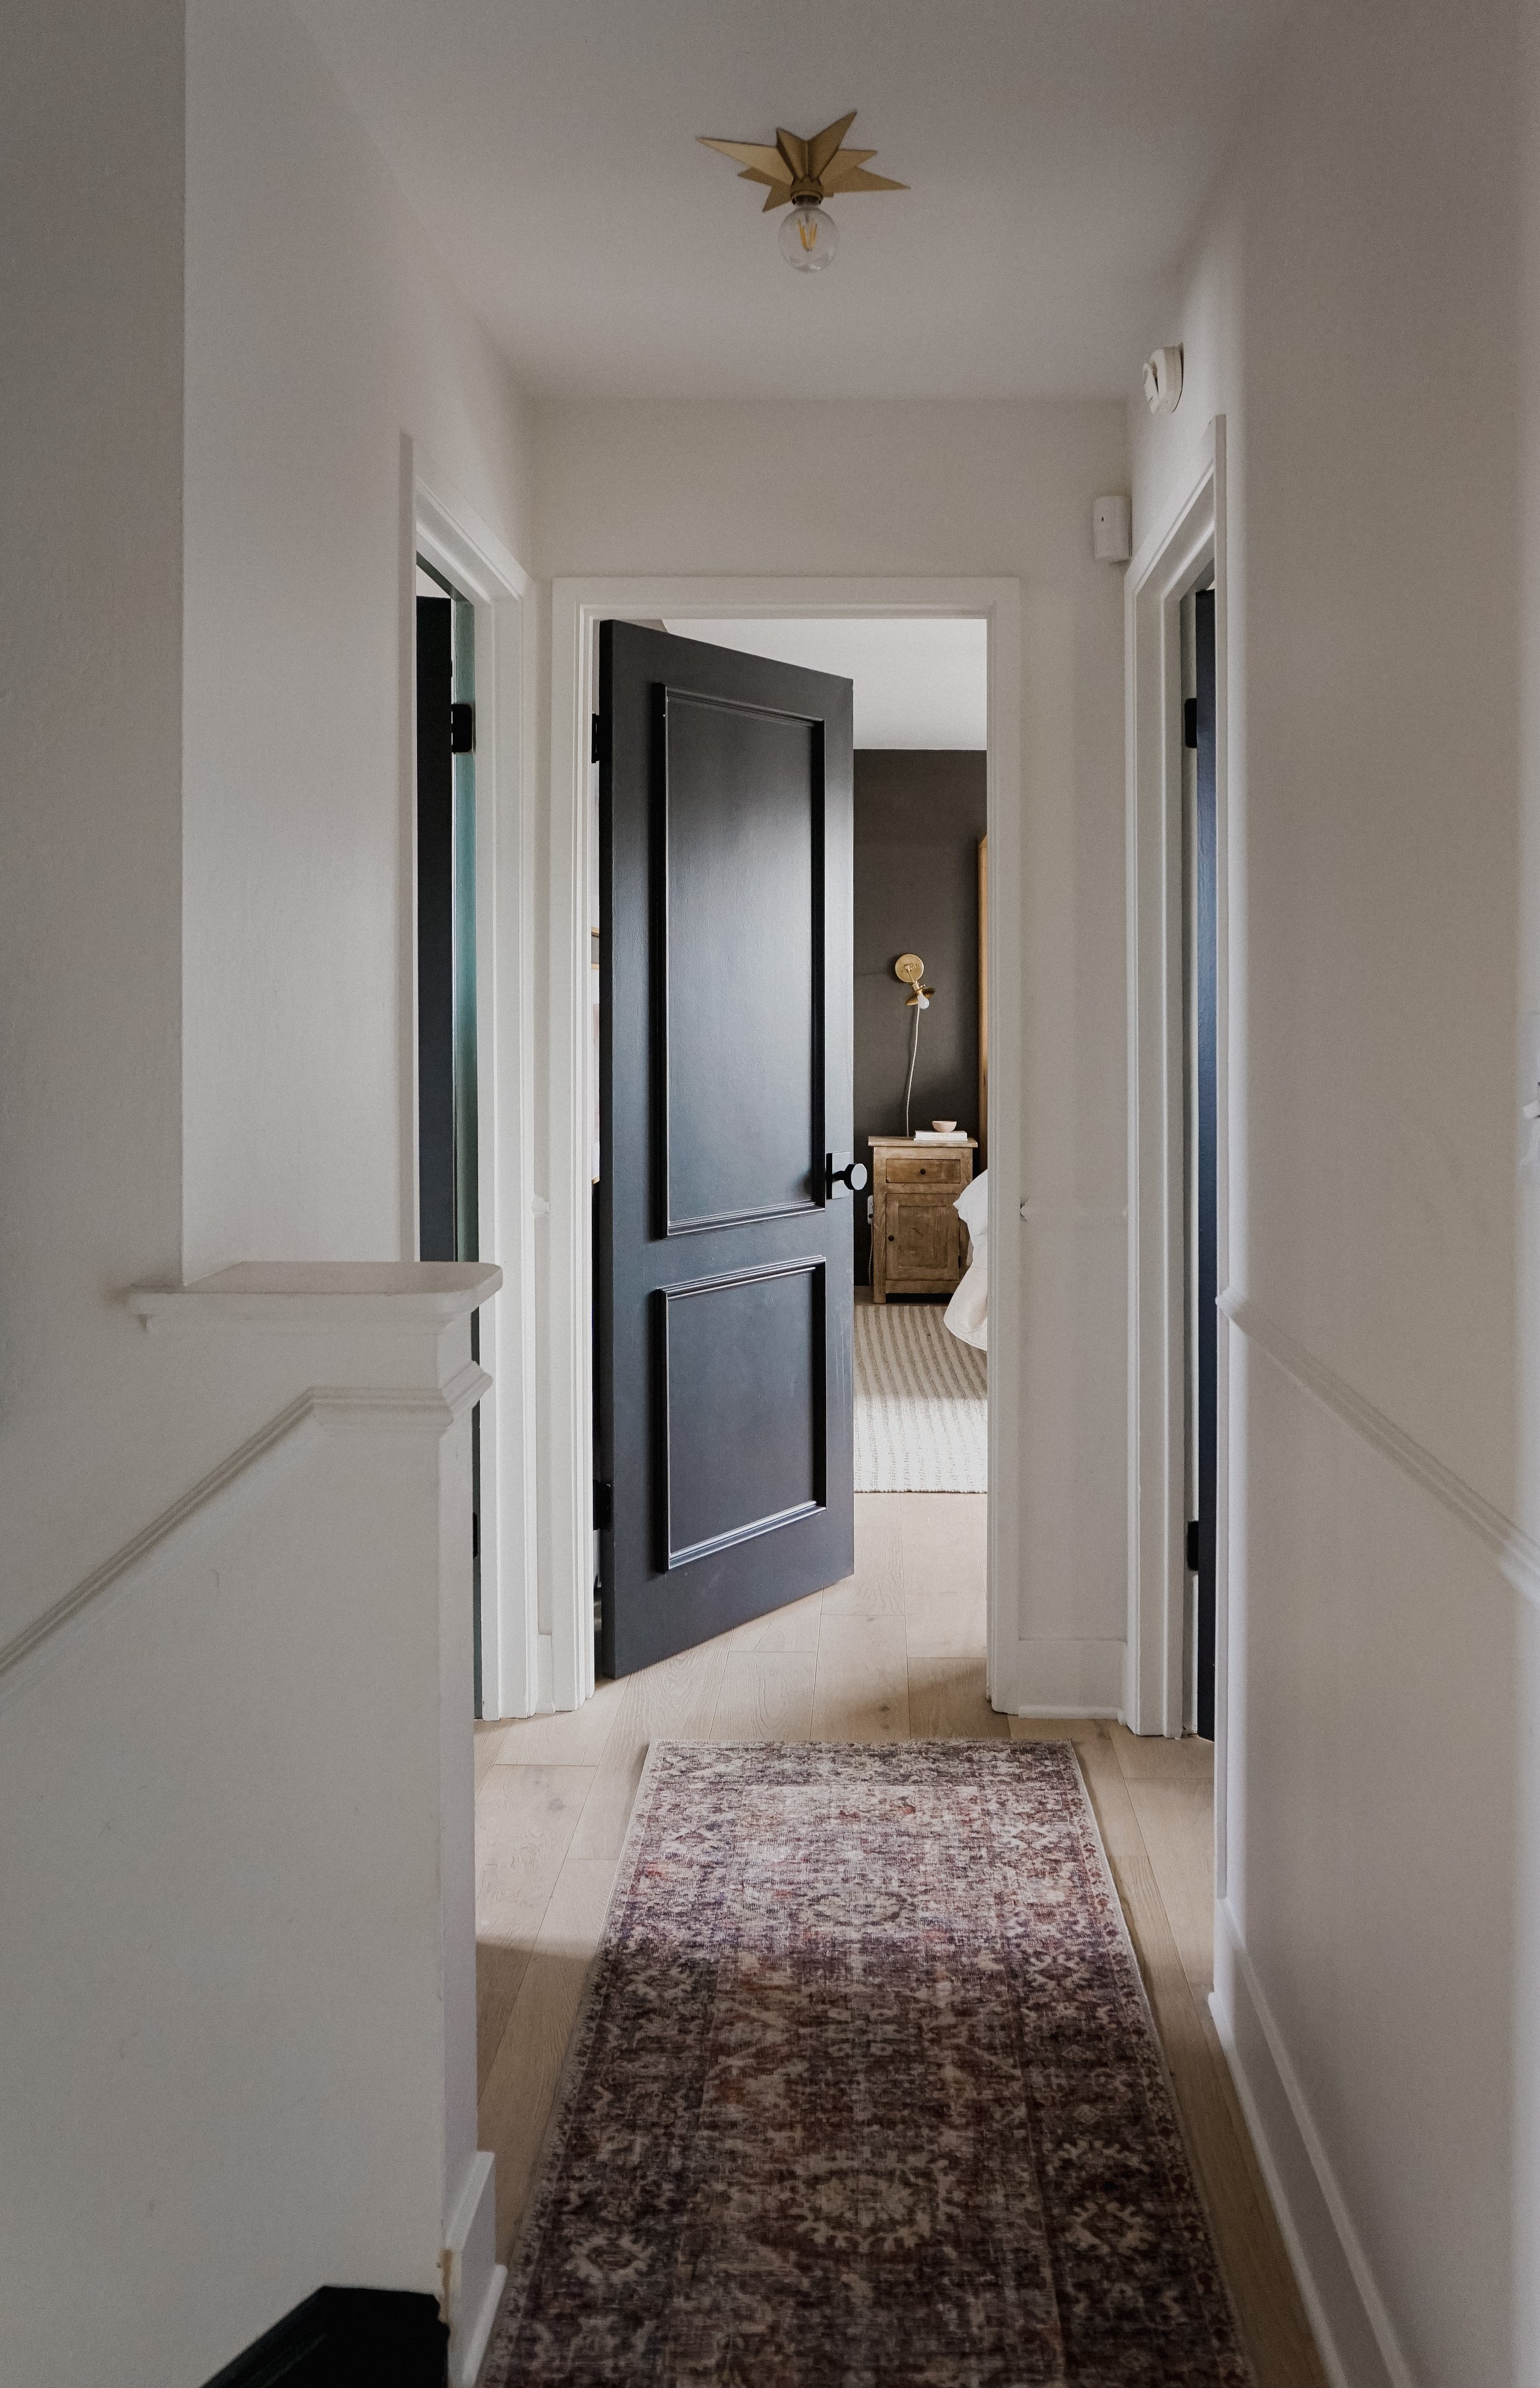
Love this star light fixture in our hallway.
One last update we did was to swap all our door hardware for these beautiful matte black door knobs and hinges from Emtek. These elevated the look of our doors so much! Here is an affordable similar option as well.
Overall, this hallway feels completely refreshed! It’s proof that you don’t need to replace your doors to give them a stunning new look in your space. We may not replace our doors after all, as I’m really happy with how these turned out. What do you think?
Love,
Valeria


